Harvesting and Storing Seed
One of the most common issues we see—and questions we get—comes down to how seed is handled in the final days before harvest and how it’s sent to the lab.
First thing - don’t ship or store your seed or seed pods in plastic. The material will rot, or get contaminated with yeast / bacteria that becomes difficult or impossible to decontaminate in the lab.
When Should You Harvest Orchid Seed?
Green Pods
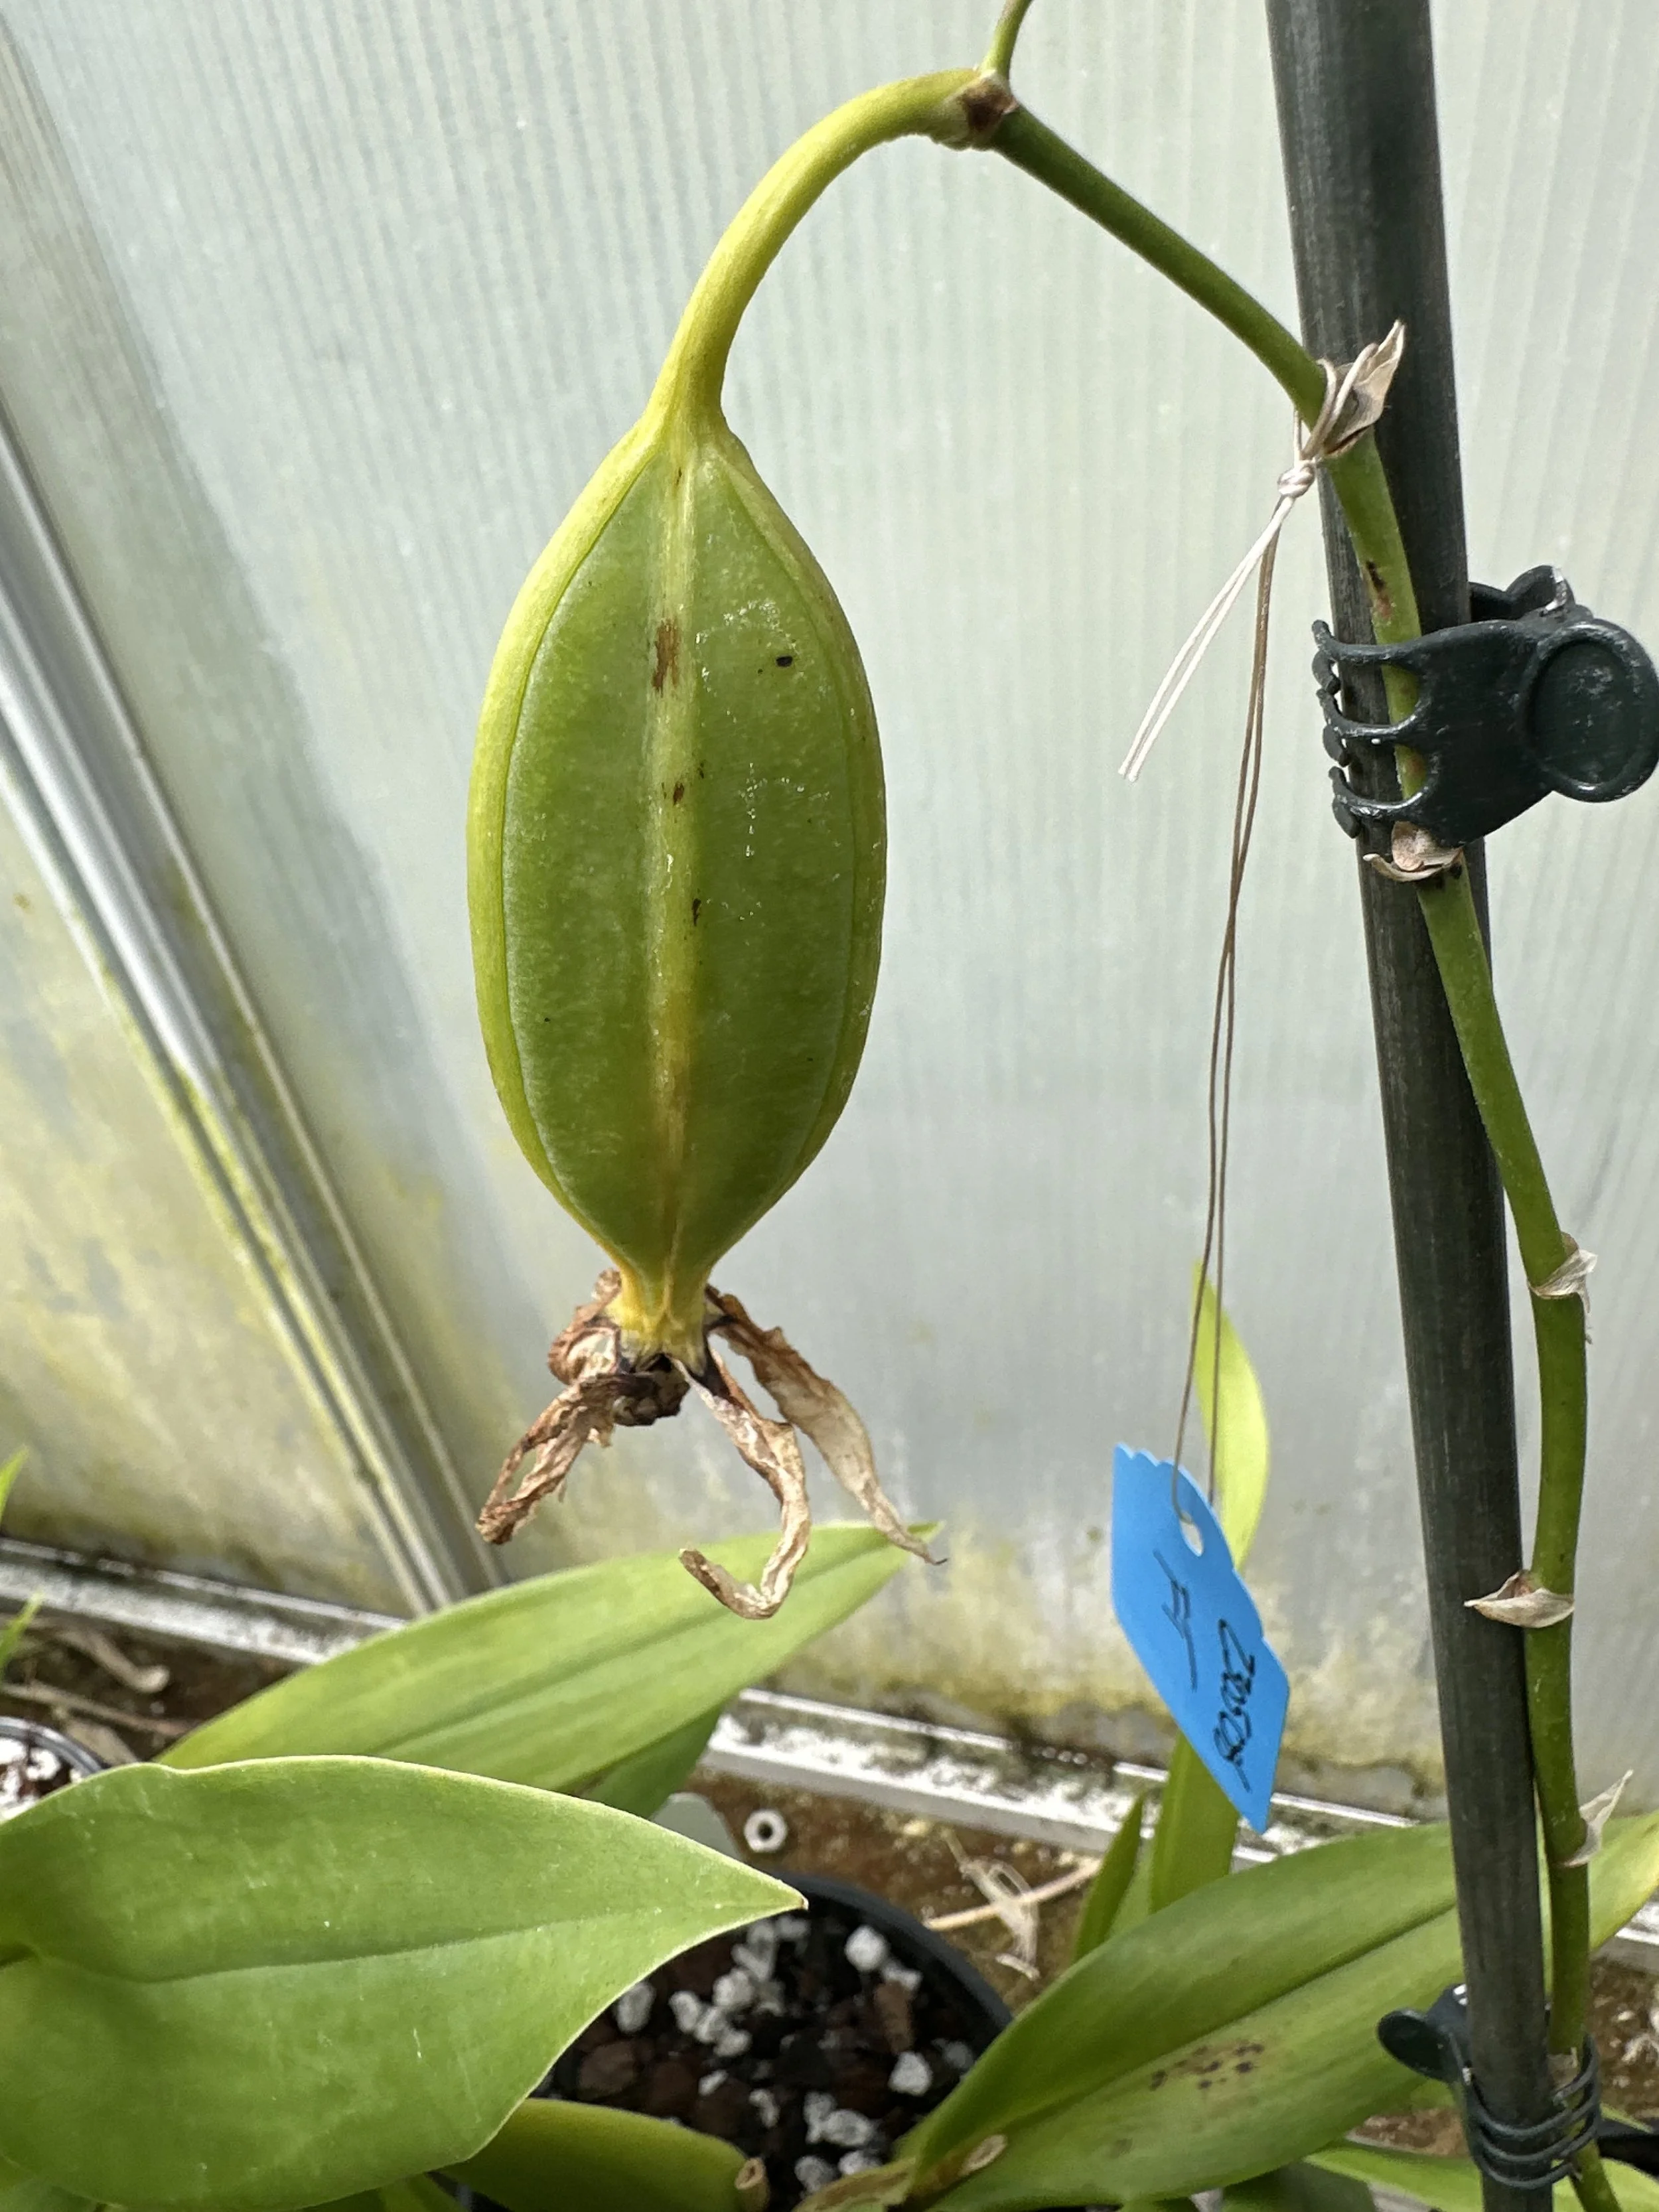
Note: We’re completely fine working with dry seed. That said, if you were planning to send green pods to the lab, the pod in the photo was at the ideal stage for green pod culture when the picture was taken. However, by the time it reaches the lab through standard shipping, it may have already split. In this case, we would recommend allowing the pod to split and dry fully before sowing. Had it been harvested and shipped about a week earlier, it would have been perfect for green pod culture.
Many growers harvest green pods—meaning the pod hasn’t yet split open—to reduce the risk of contamination. Since these pods are still sealed, they’re (in theory) free from bacteria and fungi, and there’s no seed loss.
However, harvesting too early can be a problem. Immature seeds may be sterile, underdeveloped, or too tightly packed in the tissue to be cultured easily.
So when is the right time?
There’s no single answer—it depends on the genetics and growing conditions. As a rough guide, once the end of the pod starts turning yellow, it's often nearing maturity but still viable for green pod harvest.
Our general recommendation: wait as long as possible for the seed to mature, but before you get too much yellow towards the blossom end of the pod. In our experience, green pods don’t necessarily have lower contamination rates than dry seed.
For more detailed timing, the AOS has a helpful guide on green pod maturity.
Dry Seed
Harvesting dry seed ensures the seed is fully mature—no risk of harvesting prematurely or losing viable embryos.
The downsides?
You have to closely monitor your plants. Wait too long and the pod may split, dropping seed onto the greenhouse floor.
Dry seed may be exposed to more contaminants, but our lab can usually clean it—as long as it’s been stored properly.
How to Store Dry Seed
Let the pod dehisce (split) naturally onto a piece of clean, unused paper—plain white origami paper works best, copy paper is also fine. A square sheet is ideal for making an envelope later.
Place the paper in a cool, dry, still-air environment. Avoid breezy or humid locations.
After a day or two, scrape any remaining seed from the dried pod onto the paper.
Note that if you have a fleshy pod that has started to rot / grow mold - its not going to be viable and you can throw it out.
How to Fold a Seed Envelope

These envelopes work well as they rely entirely on folding paper, and the seed is snug so it won’t fall out, and there isn’t any tape being used which often creates surface for seed to stick to.
Fold the square paper corner to corner into a triangle.
Fold the bottom corners up to form a rough envelope shape.
Tuck one corner into the pocket formed by the other fold.
Fold the envelope in half. One corner will stick up—fold and tuck it into the remaining pocket to secure the envelope.

These folded origami envelopes are the best method, though coffee filters tend to work as well, but in our experience leak seed a little more readily and hold yeast spores increasing contamination risk.

For shipping, these packets should be prevented from shaking / sliding in transit. For extra protection (if you are worried), you might slide these packets into a second envelope like stamp collectors use.
Don’t forget to write the information about your seed on the front of the packet. I like to put the cross name (or your alias / identifying code for secrecy), the pollination date, the genera, the harvest date. Add the count of plants you want back from the lab.
Extra Tips for Humid Climates
If you live somewhere humid (where produce tends to spoil quickly), consider using a desiccant. A single silica bead stored in the seed packet with the seed can help keep yeast and bacteria at bay. Otherwise, treat your seed like produce: store it in a cool, dry place, away from ripening fruits that might shed microbes.